The Provident Homemaker
  • Recipes and Info
    • Making Bread
  • My Blog
  • Favorite Resources
  • Documents and Files
  • 52 Weeks of Building Storage

Gluten-free Pizza Crust

7/10/2012

0 Comments

 
Picture
Do you need a quick pizza crust?  This one doesn't require any rising time, which means you could have a fresh-baked pizza in less time than it takes to order out!

You may like this even if you don't have to avoid wheat or gluten.  If you don't these flours and gluten's OK for you,  the recipe can be modified back to a wheat-based crust; just use a total of 2 cups flour.

Gluten-free pizza crust

1 cup brown rice flour
1/2 cup potato starch
1/2 cup tapioca flour/starch (or adjust these 3 ingredients to total 2 cups)
1 Tbsp. baking powder
1/2 tsp. salt
1 Tbsp. sugar
3/4 to 1 cup water or milk, just off boiling (very hot!)

Preheat your oven to 400 degrees F, grease a pizza pan or baking sheet.
Stir together flours/starches, baking powder, salt, and sugar. Stir in the hot water or milk and stir until it forms a dough. Pat about 1/4" thick onto the pan you're using.  Bake until just set, about 10-15 minutes, depending on thickness. Add your sauce and toppings and return the pizza to the oven until cheese is melted. (I like to put it under the broiler for 2 minutes instead, to get browned & bubbling bits on the cheese.)
0 Comments

Chalupa

5/2/2012

0 Comments

 
Picture
Years ago a college friend gave me a cookbook her family had put together.  Though I haven't tried all the recipes in it, I'm inclined to say there's not a bad one in the bunch- everything I've tried has been fabulous.  Even the strange-sounding recipe for "Vinegar Dumplings" was amazing.  I may need to post that one later for you!

This recipe is from that cookbook.  Apparently 'Chalupa' is a misnomer, to be authentic you'd use thin, small, fried corn tortilla 'boats'.  But this tastes really similar and is simpler.
This batch is big; feel free to cut it in half.  The bean/meat mixture freezes well, though, so maybe make the whole batch and have some on hand in the freezer for a quick meal! 

Chalupas

2 lb. boneless pork roast *
1 lb. pinto beans, sorted and rinsed *
1 Tbsp. chili powder
1 small can green chilies
1 clove garlic, minced
1 1/2 tsp. cumin
1/2 tsp. oregano
1 1/2 tsp. salt
* I used beef roast and black beans

Toppings:
corn chips
shredded cheese
chopped onion
diced tomatoes
sliced avocado
salsa

(Start making this about 6-7 hours before you want to eat. Or see 'Faster Chalupas' below.)   Preheat oven to 400 degrees.  Put all ingredients in a Dutch oven or roaster; add enough water to cover.  Bake, covered, for one hour, then reduce to 275 degrees.  Cook another 4-5 hours.  Add more water if the beans aren't all the way covered by it. 

Remove pork, cool and shred.  Meanwhile, cook the bean mixture with the lid off for 30-60 minutes or until thick.  Put shredded meat back into bean mixture and heat.

Serve on a bed of crisp corn chips and top with shredded cheese, lettuce,  onion, tomatoes,  avocadoes, and salsa. 

FASTER CHALUPAS:
 
#1:  use a pressure cooker.  Mine took about 30  minutes under high pressure in a Kuhn Rikon.   Plan on 1 hour instead if you have a regular pressure cooker.

OR #2: use leftover roast and 3 (15 oz.) cans of beans, undrained.  Add all seasonings except for the salt, combine and simmer for at least 15 minutes to blend the flavors.
0 Comments

Taco Meat too spicy?

4/27/2012

8 Comments

 
Picture
Did you add a little too much chili?  or maybe the lid fell off the salt shaker and now it's salty enough to kill a cat? 

When we're cooking from scratch, sometimes we get carried away with spices.  Are you stuck eating the whole batch because now your children refuse to touch it?  Or are you tempted to throw it out?

My sister-in-law asked my sisters and I what we would do.  Apparently her favorite way is to rinse the meat in a colander under running water, then return the meat to the skillet and add spices more cautiously.  Someone on Facebook said that was disgusting and would result in soggy meat. 
I'd be cautious about how much grease could go down the drain that way, potentially clogging it, but that's actually a good solution.  The meat won't be soggy if you reheat it to drive off an excess water.

Another solution is to mix something else in with it to dilute the spice:
-plain cooked oatmeal or cooked cracked wheat (a really cheap meat extender!)
-plain refried beans
-a can of drained beans (black, kidney, or pinto)
-a half can of tomato sauce (cook more if this is too soupy)

The whole point is- if the food didn't turn out the way you intended, instead of chucking it, come up with a way to fix it or repurpose it.  If that doesn't work, you're no worse off than before!
8 Comments

Homemade Rice & Roni mixes

4/20/2012

0 Comments

 
For those days that you just don't have time to think what to cook for dinner, have this on hand.  (Thanks, Rebecca!)  You can make up several mixes at once.  Not only are these much less expensive than the boxed version, but you have complete control over what goes in it.  This is especially handy if you have allergies or have to eat gluten-free.

This mix is equivalent to about 2 ½ -3 boxes of Rice-A-Roni.

Homemade Rice & Roni
Serves about 8
(put half as much in the bags to make smaller mixes!)

In a quart size bag, add
2 cups of converted rice
1 cup of broken thin spaghetti  or fideo noodles

Place the following ingredients in snack-sized bags or in an envelope cut in half (cut the short way, fill, fold over, and glue or tape closed)

2 tsp bouillon granules (Optional, you can prepare the mix with stock instead of water.)
2 Tbsp dry onion
1T dry carrots or other dried or freeze-dried vegetable (optional)
1/8th tsp celery seed
1Tbsp. all-purpose seasoning
2 tsp dry parsley
1 tsp garlic powder

*Be sure to write the name of the flavoring mix on the bag along with how much liquid to add to the mix to prepare it. To prepare you will need
2 T butter or oil
5 cups water (or stock if you omit the bullion in your seasoning)
In a 2 quart pan with a tight fitting lid, brown the rice and noodles in the butter or oil until noodles are a nice deep brown, but not burned. Add the water and the contents of the seasoning mix.  Bring to a boil, then cover and reduce heat to low for 20-25 minutes, until tender.

Other flavor ideas:
Mexican:
Use onion and carrot but for seasoning, use 1T taco seasoning, Or 1 tsp each: garlic, cumin, oregano and chile powder.
Oriental: Use onion carrot and celery seed, but also 1 tsp curry and 1 tsp Chinese 5 spice, 1/2 tsp ginger and 1T garlic powder.
Curry Chicken: Use chicken bullion, all the original seasoning plus 1tsp saffron 2tsp curry powder.

For more flavor ideas, browse the boxed pasta section at the grocery store.  You'll be sure to see something that sounds good.  Then make your own!


Instruction label for the bags of mix: 
Picture
0 Comments

Black Beans and Sausage

4/14/2012

0 Comments

 
Beans and sausage have probably been around since sausage was first invented.  Take some bland beans, add flavorful ingredients, and -presto- a nearly-one-dish-meal.  We ate ours with homemade bread and a fruit smoothie.

Picture
You can use any kind of beans you like, and any kind of sausage or similar meat.  I used kielbasa because that's what was cheap this time.  Sometimes I use hotdogs.  Or link sausage.  Or I shape bulk sausage into meatballs.  Ham Spam, or bacon would also work; the point is to add something savory and meaty. 
You can leave out the kale if you prefer; I only added it because it was calling to me from the fridge (so it wouldn't die lonely in the vegetable crisper).  It also added to the nutritional content; my mom taught me the budget trick of using half as much meat and twice as many vegetables as most recipes call for.  The onions and celery are pretty important for flavor, but if you don't like them, fine, leave them out.  Add something you do like.  Carrots or peppers would be good.
I used onion powder because some of my kids think they don't like onions.  It's really the texture they revolt against; if I use onion powder or puree the onions, nobody notices them.  The tomato and chicken bouillon enhance the meaty flavor.  

This makes a big batch; you can freeze some for later!

Black Beans and Sausage

1 lb. black beans, or 3  14-oz. cans
2 medium onions, diced, or 1/3 c. onion powder or 2/3 c. dried minced onion
1 lb. sausage (or hotdogs), cut in coins
2-3 stalks celery, chopped
4 cloves garlic, minced, or 1-2 tsp. garlic powder
1 bunch kale, chopped
1 Tbsp. chicken bouillon, or 3 cubes, or one 14-oz. can chicken broth
1 Tbsp. tomato powder, or use 1 Tbsp. tomato paste or 2 Tbsp. tomato sauce
2-4 tiny drops thyme essential oil, or 1 tsp. powdered thyme, or 1-2 Tbsp. fresh leaves

Salt and pepper to taste

Serves 8-10

If starting with dry beans, sort through to find any bits of rock or dirt, rinse, then put in a large pot with 2 quarts of water and the onions.  Bring to a boil, then cover and simmer for 4 hours.  I used a pressure cooker (a Kuhn Rikon, it's quick!) and needed only 1 ½ quarts water,  cooked on high pressure for 25 minutes.  Drain and reserve water.  If using canned beans, also drain and reserve.

Picture
In a 12” skillet, cook sausage and celery over medium-high heat until partly browned.  This really deepens the meat's flavor.  In case you like science-type stuff, this is because of the Maillard Reaction- simplified, it's the combination of amino acids (proteins) reacting under heat with the sugars (carbohydrates) to form completely new flavor compounds.  Anyway, yeah, you want to brown the sausage, even if it IS precooked.

Picture
Add garlic and stir 30 seconds, then put the kale on top, cover, and reduce heat to medium.  Check after about 5 minutes to see if you need to add a little liquid.  If so, use the bean water.  Cook until kale is tender, about 10 minutes. 


Add the meat and vegetables to the bean pot.  Stir in chicken bouillon or broth, tomato powder, thyme, 1 tsp. salt, ¼ - ½ tsp. pepper.  Taste and add more salt and pepper if needed.  Heat through if it’s not warm enough.  The flavor will be better after sitting covered for 20-30 minutes.  If it's too thick, add more of the bean water. 

0 Comments

April Fools' Food Fun

4/2/2012

1 Comment

 
Picture
So much fun I wanted to share it...

On a previous April Fools' Day we had a main dish that looked like dessert- this "carrot cake" is really meatloaf and mashed potatoes.....    

Picture
And a dessert that looked like a main dish.


Picture
So here was the whole meal. 

The actual cake, the spaghetti and meatballs, was made using the Sauerkraut Cake recipe.

Picture
Ta-da! 
The original idea came from someone's two-person 'cake', made using two giant hamburger patties-- each about a half pound-- as the cake layers, frosted the same as below.

To make this one, started with about 1 to 1 1/2 lbs of burger and make it into meatloaf, pat it into a 7" circle with vertical sides, and bake it in an 8x8 square baking dish.  When it is done, toast about 1/2 cup bread crumbs in the still-hot oven (I used panko because that's what was in the cupboard); about five minutes is all it will take.  After the mealoaf has rested about ten minutes to firm up, cover it using about 3 cups of mashed potatoes.  (I made them using potato flakes.)  To pipe the carrots, soften about 2 oz. of plain cream cheese; tint half orange, and half green.  Put each color in a ziptop baggie and snip a small corner off; squeeze a carrot shape first, then make 2-4 small green lines for each carrot top.  I used a pastry tip for the swirl on top (filled JUST the decorating tip with potatoes, and shoved my clean thumb into it); you can skip that part, use a bag and tip, or snip an 'M' shape in the corner of a ziptop baggie to pipe out of. 
To coat the sides, press a handful of crumbs against the side, repeat all the way around.   Serve warm, and refrigerate any leftovers, of course!

To make the 'spaghetti casserole', start by baking any cake in a square or rectangular pan.  My family's big enough we used a 9x13 pan.  After it's cool, frost with a rather thin layer of frosting.  Put a cup of frosting in a pastry bag fitted with a round tip (# 3) OR in a heavy-duty ziptop bag, one lower corner reinforced with tape, then snip off a tiny corner.   Squeeze frosting out, letting it randomly pile up a bit on itself to form the 'spaghetti'.  Unwrapped Ferrero Rocher make splendid meatballs, and strawberry jam makes for good 'spaghetti sauce'.   Grate a little white chocolate over the top for the 'parmesan' look.

1 Comment

Easy Pico de Gallo (yummy salsa)

2/4/2012

0 Comments

 
Picture
I've seen mango salsa before, or peach salsa, but it had never occured to me to try adding fruit to regular salsa. 

Try it, you'll like it!

Pico de Gallo           

16 oz. jar salsa (mild, medium, hot, whatever you prefer)
1 large apple, diced
4 drops lime essential oil OR use the juice and zest of one fresh lime

Stir together, and use as any salsa.
Peach or mango can be used in place of the apple.  Other fruits could be good, too- strawberry, raspberry, pear, ...

The idea came from a recipe for
Tangy Lemon Coconut Salad.  The recipe was a tad too complicated for dinner that night, plus I had no fresh tomatoes.  I pulled out a jar of salsa, added the recipe ingredients that weren't already in the salsa, and put it with the salad.  It was amazing!
0 Comments

Cooking with essential oils

1/6/2012

9 Comments

 
Picture
Pumpkin-Orange Muffins- made using essential oils!

Recipe is at the bottom of this page.

My friend's sister sells essential oils, and has had a lot of people ask how much to use if they want to cook with them.  She asked if I would play around with the oils if she provided them,  and come up with some guidelines and recipes.  Here's the start of that.  As I add more recipes, I'll add them to an indexed pdf so they're easy to access.   (More on that another time.)
First of all, please make sure that you're using pure oils that don't have any chemical residues or other nasty things.  In other words, use Grade A/Therapeutic Grade oils, or Grade B/Food Grade oils.    The label should tell you what grade it is.  There are four grades, see here for more on this.  Several sources say not to ever ingest essential oils, see more about why I disagree with thathere.

Second of all, realize this is not going to be an exact science.  Several things will affect how much oil to use in a recipe:
-What brand you use- some are better quality than others
-How old the oil is (they lose potency over time; these are strongest when under a year old)
-What the growing season was like that year for the plants
-How big your bottle is- see below for an explanation
-And how strong of a flavor YOU prefer!

I've discovered that your bottle size makes a huge difference on the size of the drops that come out.  The 15mL bottles I have require only 16 drops of oil to equal 1/8 teaspoon.  The dram-sized bottles (the kind with a stopper and a little hole in the middle of it) give out teeny-tiny drops- it takes about 64 of these drops to fill 1/8 teaspoon!  (Yes, I did crazy things like measure all of this....) If you're going to cook with your oils, I actually recommend putting your cooking-herb oils in this smaller size; so little is needed that the smaller drops are perfect.  Oils in this category would include oregano, thyme, coriander, rosemary, lavender, and marjoram.  To get a drop out, tip the bottle over the food you're adding it to, and gently rap the bottom of the bottle once.  Watch closely; it's hard to see when it comes out.  A little goes a LONG way!  The oils I've been using are from doTERRA. 
Below are the general guidelines I've learned.

When your recipe calls for herbs:
1/2 tsp. dried herb leaves =  1 1/2 tsp. (1/2 Tbsp.) fresh herb = 1/4 tsp. powdered herb = 1 tiny drop essential oil
1/2 tsp. powdered herb leaves = 1 tsp. dried herb leaves = 1 Tbsp. fresh herbs= 2 tiny drops essential oil
1 tsp. powdered herb = 2 tsp. dried herb leaves = 2 Tbsp. fresh herbs = 2 tiny drops, or 1 regular-sized drop

Using citrus oils:
1 tsp. lemon extract = 1/8 tsp. lemon essential oil = 16 drops
1 Tbsp. lemon zest = 1/16 tsp. lemon essential oil = 8 drops

So if your favorite spaghetti recipe calls for 2 tsp. powdered oregano, you can use one regular-sized drop of essential oil instead, or 4 tiny drops.

The herb ratios also seem to hold true for spices like cinnamon and ginger.  I especially love the flavor of cinnamon oil- it's a pure, clean flavor reminiscent of red hots.  I put two tiny drops in a half-pint of cream, along with 2 Tbsp. sugar and a bit of vanilla,  before whipping it-  Cinnamon Whipped Cream- delicious!  We had it on pumpkin pie, for breakfast.   The pumpkin pie itself also used essential oils for its spices.

Picture
Pan-Fried Fish

For 1 lb. boneless fish (I used tilapia):
Cut the fish into serving-sized chunks.  if there are any thin ends, tuck them under.  Pat dry with a paper towel, prinkle lightly with salt and pepper.

Breading: Combine on a plate:
2/3 c. flour, breadcrumbs, cornmeal, crushed potato chips, potato flakes, or whatever!  (I used 1/3 c. each flour and cornmeal)
1/2 tsp. salt
1/4 tsp. pepper

Dipping mixture: combine in a wide dish:
1 egg, beaten
2 Tbsp. buttermilk, yogurt, or mayonnaise
1 Tbsp. mustard (either Dijon or regular is great)
1/4 tsp. garlic powder, or 1 tiny drop garlic essential oil
1/8 tsp. cayenne pepper
1/2 tsp. thyme, or 2 tiny drops thyme oil- I used rosemary instead
4 regular drops any citrus oil, optional (lemon, lime, orange, or grapefruit)

Heat a 12" skillet over medium-high heat.  Add oil; at least 2 Tbsp. or up to 1/2 " deep, depending on how "fried" you want this.  While it's heating, drop a piece of fish into the dipping mixture; turn to coat.  Lift out, then put it in the breading.  Flip it over with a fork to coat it, then put it in the hot oil.  Repeat with other pieces until the pan is fairly full, but pieces are not crowded or touching.  Fry 2-4 minutes, until bottom is dark golden brown.  Flip, and cook other side until the thickest piece is opaque inside and starts to flake when poked open.  Serve hot, with tartar sauce or lemon wedges.

I always have leftover breading and dipping mixture.  Instead of throwing it out, I turn it into Hushpuppies:  To however much breading is left, add that much fresh flour (breading is very salty!) If you now have a cup of this dry mixture, add 1 1/2 tsp. baking powder.  If you have less or more flour/breading, use less or more baking powder!  Add whatever dipping mixture is left.  Add water if you need, to be able to get a soft dough that more or less holds its shape.  Drop by spoonfuls into the hot oil.  Fry until golden ( a couple minutes), turning them over once.


Pumpkin-Orange Muffins- makes 12
2 c. flour (I used whole wheat)
1/2 tsp. baking soda
1 1/2 tsp. baking powder
1/2 tsp. salt
1 tsp. cinnamon, or 1 regular-sized drop cinnamon essential oil
3/4 c. sugar (or 1/2 c. honey)
1 c. buttermilk or sour milk
8-16 drops orange essential oil (1/16 to 1/8 tsp.)- this is distinctly orange-flavored!
1 c. pumpkin puree
1 beaten egg
1/4 c. oil or melted butter
1/2 c. chopped pecans, optional

Preheat oven to 375 degrees.  Grease 12 muffin cups, or line them with cupcake papers.  Mix together the dry ingredients: flour, baking soda, baking powder, salt, cinnamon, and sugar.  Add the wet ingredients all at once: buttermilk, orange oil, pumpkin, egg, and oil.  Stir just until combined.  Spoon into muffin tins, then sprinkle with the nuts.  Bake about 16-18 minutes, or until lightly golden and the top of a muffin springs back when touched. 

9 Comments

My book! The Chameleon Cook: Cooking Well with What You Have

9/1/2011

8 Comments

 
Picture
Just printed this week, a cookbook that may become your go-to source for  your cooking:

The Chameleon Cook:
Cooking Well With What You Have

140 pages of adaptable core recipes, frugal cooking information, rules-of-thumb, and guidelines for cooking everyday food with what you have on hand, including how to adapt to cooking without eggs, dairy, sugar (honey instead), or wheat.  It also includes an index.

  At 5½“x 8½“ it's intended to be easy to fit in any size kitchen.  Any level of cook will find it useful, from beginners to old-hat.  I recommend it especially for college students, missionaries, newlyweds, or anyone wanting to expand their understanding of how to make a recipe work. 

  It has a laminated cover for durability, full-color cardstock chapter dividers with photos, and your choice of plastic coil binding or plastic comb binding.
 
Cost is $14 if purchased through me, $14.95 if bought retail.  Copies may be purchased at John and Jennie's Bosch Kitchen Center, Not Just Copies, and the Sandy Bosch Store.  You can order by calling (801) 541-6999, leaving a comment on this page, or emailing me at [email protected]


Picture
Chapters include:
-Introduction and Tips
-Appetizers (Snacks!) and Beverages,
-Soups and Salads
-Vegetables and Side Dishes
-Main Dishes
-Breads
-Desserts
-Cookies and Candy
-This & That

Picture
Categories in Main Dishes include
-Beans (including cooking them from scratch, and how much is in a can)
-Eggs
-super-adaptable Red Sauce and White Sauce
(make your own Cream of Mushroom Soup and more)
-Meat, including how to make a cheap cut tender

Picture
Sections in This & That:
-Cooking Grains

-Miscellaneous
-Dairy Foods
-Dehydrated Foods (both making and using them in your regular recipes)
-Home Remedies
-Homemade Cleaners
-Seasonings, Jam, and Syrups


Some recipes in the sections include:
-Croutons
-Edible Playdough
-Fruit and Nut Energy Bars
-Granola, Granola Bars
-Homemade "Honey Bunches and Oats"
-Brown Bag Popcorn
-Cream Cheese Spreads
-Making simple fresh cheese and cottage cheese
-Snow Ice Cream
-Sweetened Condensed Milk
(two versions- one using powdered milk, one using evaporated milk, cream, or half-and-half)
-Culturing Yogurt
-Apple Cider Syrup
(Lower Sugar Syrup)
-Five-Minute Marmalade and a dozen ways to use it
-Honey Mustard
-Honeybutter
-Quick Strawberry Jam
-Seasoned Flour
-Seasoned Salt
-Simple Syrup
and variations
-Home Remedies- Coughs, Insect Stings, Lowering Fever, Natural Deodorant
-Homemade Cleaners- Floor Cleaner, Furniture Polish, Laundry Soap, Liquid Soap, Carpet Spot Cleaner, Stain Remover, using vinegar, Window Cleaner.

If you need one (or more) shipped, I charge only the actual shipping cost plus the price of a padded envelope.

Call or e-mail today!

-Rhonda
8 Comments

Smoked Turkey, Green Bean, and Potato Salad

8/24/2011

0 Comments

 
Picture
This potato salad is just right for a nice main dish.  It has bits of bright flavors and crunchy sweetness; one of my favorite salads. 

It uses those fabulous, creamy "new potatoes" that are a hallmark of  hot summer days.  This is tossed with a basic vinaigrette instead of the usual mayonnaise, then fresh vegetables are mixed in.

1 1/4 pounds small red potatoes, cut in 3/4" cubes
Vinaigrette, below
1/2 pound green beans, sliced into 3/4" pieces
3 c. sliced mushrooms, optional*
6-8 oz. smoked turkey, sliced into 1x 1/4"x 1/4" strips
1 sweet red bell pepper, sliced into 1/2" pieces
2 stalks celery, sliced diagonally
1/4 -1/2 c. diced purple onion
1/4 c. fresh parsley, minced

Vinaigrette:
1/2  c. water (use the cooking water from potatoes)
1/2 tsp. chicken bouillon (or cook potatoes in chicken broth)
2 Tbsp lemon juice or white wine vinegar
1 1/2 tsp. Dijon or other mustard
1 Tbsp. olive oil
1/4 tsp. salt
1/8 tsp. freshly ground pepper

Cook potatoes in boiling water; they should take just about 15 minutes to become tender.  Meanwhile, in a large bowl, whisk together all ingredients for Vinaigrette except for the water.  When potatoes are tender, scoop them out with a slotted spoon and add to the bowl.  Toss to coat.  Add green beans to the still-hot cooking water; bring to a boil.  Cook for 4-5 minutes, until the beans are crisp-tender.  Scoop them out and add to the potatoes, then measure out 1/2 c. of the cooking water and add to the mixture.  If you want the salad served chilled, refrigerate it at this point.

Add mushrooms, turkey, bell pepper, celery, onion, and parsley.  Stir to coat, and serve. 

*If using mushrooms, double the ingredients for Vinaigrette; mushrooms are very absorbent.

The original recipe called for 1/4 lb. less potatoes and 1/4 lb. more meat.  If you love meat, you'll probably prefer it  with more.  I tend to use meat more as a flavoring than as a main ingredient; it's cheaper, and makes a lighter salad.

0 Comments

Perfect Hardboiled Eggs

4/20/2011

1 Comment

 
Picture
Alright, perfection is in the eye (or mouth!) of the beholder.  My perfect egg may not be yours, but here goes...

The goal was to get tender whites and moist yolks, with the least amount of energy possible.  I put a dozen eggs in a pan, added water just to cover, put a lid on, and turned the stove on high heat.  Eight minutes later, when they came to a boil, I turned the heat OFF, left the lid on, and started timing. 
Picture
These are the experimental eggs:

Front row, starting left: cooked for 5 minutes after the water boiled; middle front egg was cooked 6 minutes; front right got 8 minutes.
Back left was pulled out at 10 minutes; back middle at 12; back right at 15 minutes.   All eggs were put into cold water as soon as they came out of the pan, to make them stop cooking. 

The five-minute egg was very tender, very moist, but would mash densely if you wanted deviled eggs.  For eating, though, I thought it was great.  Same with the 6-minute egg.  My kids preferred them at the 8-15 min marks. 

Picture
The left egg was left in for 15 minutes.  You can see it was too long because of the grey-green layer on the yolk's exterior. The one on the right was the 5-minute egg.

So for my idea of perfect hard-boiled eggs,  do this:

1- put eggs in a pan, cover with cold water.
2- Put a lid on; heat on high until the water reaches a full rolling boil.
3-Turn heat off; leave pan on the burner, with lid on.
4- 5-6 (or up to 12) minutes later, dump hot water and cover eggs with cold water.  Cool and eat.

Your timing may be different, but this will give you a good starting point. 

For instance, your elevation will make a difference.   I live at about 3500 feet in elevation.  The boiling point of water at sea level is 212 degrees F, but is only 205 degrees at my elevation.  That means that if you're cooking these at sea level, they'll be done a little bit sooner, since the water was hotter.  For every 500 feet in altitude, the boiling point goes down about one degree.

If you have a gas stove, you might need an extra minute.  (I don't know, just guessing!)  My stove is electric, and the burners stay hot for a couple minutes.  Gas burners don't, so they, and the pan on them, would cool faster.

Leftover hardboiled eggs?

Here's a family favorite recipe:

Tuna Burgers,  serves 4              

3 hard-cooked eggs, chopped

1 (5-oz) can tuna, drained and flaked

½  c. (2 oz.) shredded sharp Cheddar

¼ c. chopped green pepper or celery

¼  c. chopped onion

1/8  tsp. garlic powder

¼ tsp. salt

¼  tsp. pepper

¼ c. mayonnaise

4 buns or Kaiser rolls, split


Heat oven to 400 degrees.  Mix everything together and spoon onto rolls.  Wrap in foil, then bake 15 minutes or until warm through.  Also good cold on lettuce as a salad.

Need more ideas?

  • Slice them into green salads (Chef Salad, if you also add your leftover ham!) Or maybe Wilted Spinach Salad with warm Bacon dressing?
  • chop them and add to white sauce; serve over buttered toast (My family calls this Creamed Eggs and eats it for breakfast.) For Goldenrod Eggs, only add the whites to the white sauce.  Push the hardboiled yolks through a sieve over top of the sauce on toast. 
  • make deviled eggs
  • sliced or chop and add to casseroles
  • make egg salad/sandwiches
  • egg-olive sandwich: chop 4 eggs with 8 stuffed olives and 2 T mayo.  Spread on bread.
  • add to potato salad
  • stir into macaroni salad
  • add to chicken salad, especially with curry powder added
  • mix with cooked hamburger and Mexican spices for empanada filling

If you need actual recipes, there's a great collection at Sparkpeople.com

1 Comment

Cookbook- Main Dishes cards 3 & 4

3/26/2011

0 Comments

 
Picture
Rice and more...

Picture
Barbecue Sauce.  Make it quickly using tomato sauce as the main ingredient.

Picture
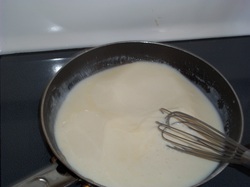
White Sauce- simple to make, and the base for several recipes.

Main Dishes card 3  Recipes for pureed (any)vegetable soup, simple pasta sauce (starting with a can of diced tomatoes or tomato sauce, rice- basics, fried rice, Spanish rice, and rice pudding (which is breakfast food around here).

Main Dishes card 4 covers how to roast meat, methods of tenderizing it, simple soup, and white sauce with instructions to make it thin, medium, and thick.  Includes options for making it gluten-free.

0 Comments

Cookbook- first two cards for Main Dishes

3/22/2011

1 Comment

 
Picture
Card 1 includes chili, cooking beans, white sauce/gravy, and omelets.

Picture
Card 2 is all about potatoes: potato pancakes, mashed, roasted, oven-fried, and baked.


Main Dishes card 1
 

Main Dishes card 2
1 Comment

Tiny Spicy Chicken, and the monster under the bed

2/25/2011

5 Comments

 
Picture
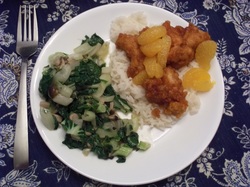
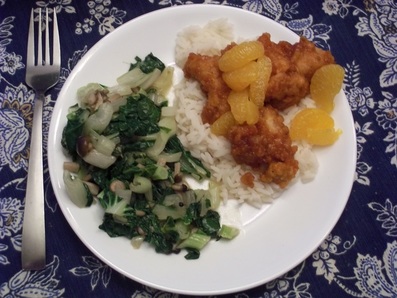
Tiny Spicy Chicken is great over rice, with a little fruit to help balance out the heat.   Bok choy is great on the side.

Do you have children or grandchildren who are afraid of what’s lurking under their beds?  Here’s the perfect solution, found on Meridian magazine online a couple months ago:


The Monster Under the Bed
"I overheard my two young adult sons talking.  One asked, “Do kids really think there are monsters under their beds?”  The other one answered: 'I never did.  There was always so much food storage under there that I knew there was no room for a monster.'”


 So let's all chase out those monsters!  For a lot of suggestions on storing food when you have little space, see the Food Storage Made Easy page.

______________________________

This recipe came from a class at the Macey’s in Logan, back when I lived there.  “Tiny Spicy Chicken” was one of the entrees at Mandarin Gardens, a local Chinese restaurant.  Maybe it’s a Cache Valley specialty, because I haven’t run into anyone not  from there who has had this dish. 


Tiny Spicy Chicken

3 lbs. boneless, skinless chicken, cut into 1 ½ “ cubes
garlic salt
2 beaten eggs
1 cup cornstarch
¼ c. oil

            Sprinkle chicken with garlic salt, let sit for 1 hour in the fridge.  Heat oil in a large frying pan.  Dip chicken into eggs, then roll or shake in a bag with cornstarch.  Brown chicken pieces in the oil, until golden brown.  Put in a greased 9x13 pan.

Shortcut method: use 1- 1 ½ lbs. fully cooked chicken nuggets, frozen is OK.  (Don't use 3 lbs nuggets; they have too much breading that soaks up this sauce.)

 Sauce:
½ -1  tsp. chili paste*

1 c. sugar
½  c. ketchup
2 tsp. soy sauce
Dash of salt
½  c. chicken broth
¼  c. brown sugar
½ c. vinegar

 Sauce will be very runny.  Pour over chicken (if using chicken nuggets, mix the sauce in the 9x13 pan, then add the chicken) and stir to coat.  Bake at 425 degrees for 10-15 minutes, stirring once or twice during that time.  Serve over rice.

Alternate cooking methods: bake at 325 degrees for 1 hour, stirring a couple times, or put in a crockpot and cook on low for 5-8 hours.

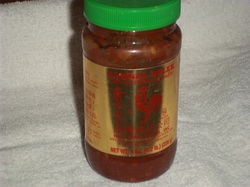
*Sambal chili paste can be found in the Asian section at Macey's grocery store, it probably can be found at most other grocery stores.  If you don't have it, or can't find it, substitute red pepper flakes.  Start with 1/4 tsp., put it in the sauce, then taste to see if it's as hot/mild as you like.
Picture
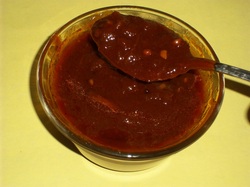
Chili paste is made from whole, hot chilies, ground up, and mixed with a little vinegar.  It includes the seeds, so it packs a punch.

Picture
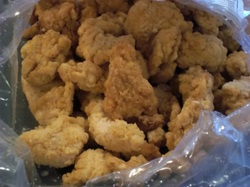
If you use raw chicken breasts, the recipe takes about 1 1/2 hours to make.  If you start with these, you can have it done in 20 minutes.

Picture
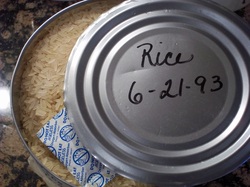
Aren't cans and oxygen packets great?  I opened this can just yesterday.  And yes, 6-21-93 was when it was sealed.

Picture
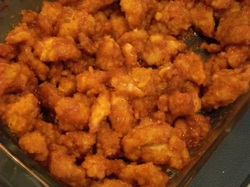
The chicken, coated with sauce, ready to bake.

Picture
Baking it condenses the sauce and helps it soak into the coating on the chicken.  It's a little sweet, and a little zippy. 

5 Comments

Prepare and not be afraid/ Tender and Moist Meatballs and Meatloaf

1/26/2011

0 Comments

 
Picture
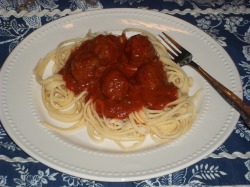
Mmm...meatballs!

This quote was recently brought to my attention; it’s from some training that our General Relief Society President recently gave.  It is motivating and assuring at the same time.  I am grateful for wise and loving leaders, as well as the Spirit, to guide us.  I know they teach truth.

Below it  is a very adaptable recipe for meatballs/meatloaf.      

-Rhonda


“I have a sense and a feeling as we have watched some of these disasters in the world, that this is a time for us to learn and prepare from these experiences.   The preparation happens in our own homes. There are not enough tents in the world to furnish every person with a tent unless the members of the church have a tent in their own homes...a simple thing like that. And then the storehouse is pressed down, heaped over and running over in our own homes. Some of you have student apartments, how prepared are you? If an earthquake or an economic disaster happened, would you have enough water to drink for 24 hours? Would you be able to get by until help could come to you? Those are the kind of the things we need to be thinking about in our day and time, the Lord expects us to do our little part and then He can bring on the miracles and then we don't need to fear.  I bear you my testimony that the gospel of Jesus Christ is true, and that these principles will strengthen us individually, and as a family, and as a people, and as a church.  As we listen to prophets of God we will be okay.  We don’t need to worry about being alive in this scary time.  The world has had scary times before and the Lord has always taken care of His people who have been faithful. “

 –  Julie B. Beck  

see herefor her whole video clip, then click on Training Video: Self-Reliance


Meatballs and meatloaf are essentially the same food; only the size differs.  Burgers or patties can be the same recipe, too.  In the simplest version, you simply salt and season meat, then form and cook it.  To end up with tender, juicy results, you either use higher-fat meat, or use something to help hold the moisture in.  Many recipes call for crushed crackers or dry breadcrumbs, but the most tender results come from making a panade, which is a bread-and-milk paste.  You can also use, in the same amount as the panade,  mashed or grated potato, cooked rice, leftover cooked oatmeal (unsweetened!) or other hot cereal for this. This would make the meatballs be gluten-free.  Dry crumbs soak up more moisture, leaving you with a drier result.  Egg is usually used as a binder, to hold the meat together. And try to not squeeze the meat very much when you’re mixing it; compressed meat is tough.  Other than that, use whatever flavor additions you prefer –


Onion, garlic, ground pepper, Worchestershire sauce, soy sauce, raw pork sausage, Parmesan or other cheese, parsley, rosemary, thyme, nutmeg, Liquid Smoke, bacon pieces, diced chili peppers, shredded zucchini or carrot, chopped mushrooms, bits of sundried tomatoes, chopped spinach.  

 
 For quick, simple meals later on, make a BIG batch of meatloaf, and shape it into

* a couple meatloaves

*rolled meatloaf- pat into a rectangle on some waxed paper, spread on some filling (cheese and spinach, or whatever sounds good), roll it up with the help of the waxed paper.  (Don’t leave the paper inside it!)

*some meatballs

*mini meat loaves (portions to bake in muffin tins or custard cups)
*patties

 Freeze on cookie sheets so they won’t stick together, either before or after cooking them, then pop into freezer bags, squeeze the air out, label and freeze.

For several flavor variations, click on   Tender and Moist Meatloaf and Meatballs .

Tender and Moist Meatballs or Meatloaf


2 slices good-quality white bread, cut in ¼” cubes (1 ½ c.)
3 Tbsp. buttermilk, thinned yogurt or sour cream- milk works but is less creamy
1 egg
1 ½ lbs. lean burger (may use pork sausage as part of this)
¾ tsp. salt
¼ tsp. pepper
¼- ½ c. Parmesan cheese
¼ c. minced fresh parsley
2 cloves garlic, minced

Combine the bread, buttermilk, and egg, or use 1/2 c. other wet starch (i.e. cooked rice, oatmeal, mashed potato), with the egg, omitting buttermilk.  Mash together until it forms a paste. Add everything else and mix gently.  Form into meatballs, 1- 2” in diameter.  If you’re cooking them right away, they’ll hold together better if you first refrigerate them for an hour. To cook, pan-fry over medium heat in 1-2 Tbsp. oil, shaking the pan often to turn the meatballs.  1 ½” meatballs should be done in about 10 minutes.  Add to sauce, or cool and freeze.

Another way to cook them is:

Put meatballs on a cookie sheet.  Bake at 450 degrees F for 12-15 minutes, rotating the cookie sheet back-to-front halfway through.  Partially cool, then freeze.


Meatloaf:

Mix, form into a loaf, and bake for 1 hour @ 350 F. Before the last 15 minutes, brush with
Meatloaf glaze:

1/4 c. ketchup
1/4 c. brown sugar
1 Tbsp. Dijon mustard
1 tsp. cider vinegar
Picture
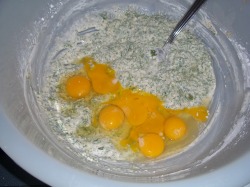
This is the panade mixed with the seasonings; eggs are mixed in before adding the meat.  There are so many eggs because this is for a ten-pound batch of meatballs/loaf.

Picture
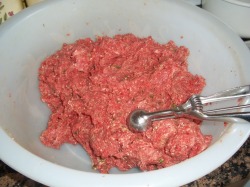
Fully mixed.  A small icecream scoop (this is a #10) makes quick work of meatballs.   Another way to make evenly-sized ones is to pat the meat in a square or rectangle, then cut them into evenly-sized small squares.  Roll each one.  One pound of meatball mixture will give you about 30 1-inch balls.

Picture
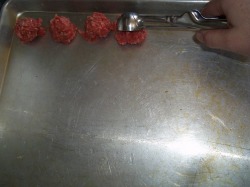
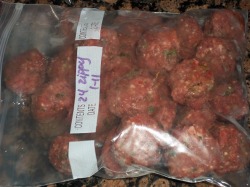
Put the meatballs on a lightly greased or sprayed cookie sheet.  For the roundest meatballs, roll them between your hands.  You can bake them now, and freeze them already cooked, or freeze them raw.  Put the whole tray in the freezer.  When they're solid, remove and put the meatballs in a freezer-safe bag or container.  Squeeze out the extra air, label, and put back in the freezer. 

Picture
The individually-frozen meatballs packaged and ready to go in the freezer. They're best if used within a few months, but they'll be safe to eat for much longer.  (I've used 2-year-old meatballs before.)

0 Comments

FHE lessons on the Constitution; Chicken Nachos

11/10/2010

0 Comments

 
Picture

(originally from 6/11/10)
This last week I moved my bookcases around (thanks to a great organizing suggestion from a neighbor) and found a treasure:

In 1987, to celebrate the Bicentennial of the signing of the Constitution, the Church published a 14-page booklet with Family Home Evening lessons on the Constitution and the Founding Fathers.  I had a copy hiding amongst our books.  It's also available online.  The lessons are great for teaching simply and powerfully what is at the heart of our country's existence.  At the following website, halfway down the page you can click to download this in pdf format. http://www.latterdayconservative.com/articles/family-home-evening-lessons-for-the-bicentennial-of-the-constitution    

Use it, teach it, spread it around!  We've been told often (especially the last couple LDS General Conferences)  to teach our children truth; this is a great way to see that they are being taught the truth about our nation's birth.

Here’s what lds.org had to say about the booklet (Ensign, Nov. 1987, 102–3)

Booklet Published

The Church has published for its members in the United States a special booklet explaining the divine significance of the U. S. Constitution and its principles.

The First Presidency has asked that the booklet be used as the subject of family home evening lessons by all member families in the United States.

The delegates to the Constitutional Convention in 1787 were inspired men the First Presidency said—men who produced a document that the Prophet Joseph Smith called “a glorious standard” and “a heavenly banner.”

In a preface to the new booklet, the First Presidency stated the purpose of the publication:

“In commemoration of this important event, we are providing this booklet, which contains three family home evening lessons, activity ideas, and a copy of the Constitution. We encourage you to prepare and teach each lesson prayerfully so that family members may feel the divine significance of the Constitution in their minds and hearts.”

Some 1.3 million copies of the booklet have been printed and are available to congregations throughout the United States. Local leaders may order copies through the Salt Lake Distribution Center.

TV Special

“America, the Dream Goes On,” was the title of a one-hour variety special spotlighting the U. S. Constitution. The show was produced by Church-owned Bonneville Media Communications.

The television special featured singing by the Tabernacle Choir and Marie Osmond. LDS actor Gordon Jump portrayed Benjamin Franklin. Another prominent actor, Harry Morgan, was host and narrator. The show was televised nationally in September (1987)."

* * * * * * *
Chicken Nachos     6 servings

1 can cheddar cheese soup (or make 1 cup of white sauce and stir in ½ c. cheese)   
1/2  c. salsa   
1   c. cooked chicken,  diced  (I use my frozen or canned chicken)
1   10 oz bag   tortilla chips    
        chopped tomato, optional    
        sliced olives   
On low, heat together soup, salsa, and chicken.   Serve over chips; top with tomato and olives.
0 Comments

12 Ways to Sabotage Your Family's Preparedness; Crustless Quiche

11/3/2010

0 Comments

 
(originally from 7/23/10) Here’s a timely article (condensed) that came from Carolyn Nicolaysen at Meridian Magazine this week- all of us can find some room to improve here..

In a real emergency, no one is going to ride in and rescue us if the calamity involves the whole community. Government, church leaders, prophets, and emergency response organizations all tell us to prepare – and to expect that in the aftermath of a disaster we will be on our own for 72 hours at least, and possibly for days or weeks after that.

Coping with natural disasters is one thing – coping with a
slow drain on our back-up reserves is another. Food storage and emergency preparations require planning, continuing education, and awareness of our changing needs. In this time of downsizing and economic disappointment, it is more urgent than ever before in our lifetime that we commit to self-reliance and stay on top of our family emergency plan. Don't be left wondering when that crisis comes, "what have I done?" Here are twelve ways we could sabotage our own best efforts:


Here’s the quick list, for what she means by them, see the link afterwards:

1-    Move too fast

2-    Look for the easy fix

3-    Ignore nutritional needs

4-    Fail to include non-food essentials

5-    Ignore a sensible storage strategy

6-    Overlook comfort items

7-    Overdo it!

8-    Underestimate the value of water

9-    Put your storage in the basement and forget it!

10-Who needs dates and labels, anyway?

11- Lose track of what you have.

12-Put it all under the bed.

  http://ldsmag.com/emergency/100720plan.html

 
* * * * * * *
Crustless Broccoli Cheese Quiche

 If you don’t like broccoli, you can either leave it out, or use 5-10 ounces of a different vegetable instead.  Try cooked sliced zucchini, onions, Swiss chard, spinach, or whatever sounds good.  These are simple to make because there's no crust.

1 package (10 ounces) frozen broccoli florets
6 large eggs
1/2 cup half-and-half  or evaporated milk
Ground pepper
1/8 teaspoon ground nutmeg
3/4 cup shredded cheddar cheese (3 ounces) – or other cheese 
Crusty bread and mixed salad (optional)

Preheat oven to 350 degrees. Butter four 8-ounce ramekins (or a 9-inch pie pan); set aside. Bring a medium pot of salted water to a boil. Add broccoli; cook 1 minute. Drain well; transfer to a cutting board, and blot dry with paper towels. Chop coarsely. Or microwave the broccoli for a couple minutes instead, then chop.

Beat together eggs, half-and-half, 1/2 teaspoon salt, 1/4 teaspoon pepper, and nutmeg. Stir in broccoli and cheese.

Put ramekins on a rimmed baking sheet. Divide mixture evenly among the four ramekins, or fill a 9” pie pan.  Bake until golden brown, 35 to 40 minutes. Serve with crusty bread and a salad, if you like.

 
0 Comments

Progress with The Challenge, Althea’s Thyme Chicken

10/26/2010

0 Comments

 
Hi everyone,

This week, take a minute and look back.  How is your Three-Month Challenge coming?  Have you filled out the survey with your visiting teachers?  (It would be helpful to get them to me by this Sunday - but if you can’t, don’t give up!  Just do it soon.)  Have you figured out how much you need to feed your family for 3 months?  My friend Elizabeth said the easiest thing for her was to break it down by meals-  how much cereal, powdered milk, and pancake/syrup ingredients (or whatever your family prefers)  would it take to eat for a week?  Then multiply that by 12 to get your 3 months’ worth. Write it all down.  A food storage notebook (or spreadsheet, if you like that better) is a great idea.   Then tackle lunch.  Then dinner.  Her goal was one of those per day.

To find what you still need to buy, inventory next.  I know that sounds awful, but it really isn’t that bad.  I just keep picturing Joseph keeping track of everything in Potiphar’s house.  Now there was a good steward.  “The Lord made all that he did to prosper in his hand.” (Gen. 39:3)   I’d like to qualify for that blessing, too!  If you haven’t yet inventoried what you currently have, grab a notebook and start.  The easiest way for me is to write categories (i.e. canned vegetables, box of cake mix, bag/can of flour, etc.) and just write tally marks- or count and write down the number if you’ve got a lot.  After you inventory, sit down and compare what you need with what you have.  Remember, getting your three months’ worth is the hardest part of the whole food storage plan.  And you can do it!  You all have visiting teachers who’d love to help where they can.  We’re all here to help each other. 
 

This recipe is from my 6-foot-3, skinny-as-a-rail Jamaican roommate in college.  She only had time to cook once a week, so she’d make a big pot of either this or her chicken curry, then eat that all week.  Yummy stuff.  She never measured ingredients, so don’t worry about being accurate!

           Althea's "Oven Method"  Chicken     4-8 servings

8   pieces bone-in chicken (2-3 lbs., or use 1 lb boneless)   
2-3   tsp.  seasoned salt   
1   small to medium   onion,   sliced into rings
3-4   stalks   green onions,   cut in 1/2" pieces (if you don’t have this, use a little bit bigger onion)
¼   c.   butter or margarine   
2   sprigs   fresh thyme  or 1 tsp. dried  (if anyone local needs a plant, see me)
3-5    medium   tomatoes,   chopped 

hot cooked rice    


Put chicken in a bowl.  Add seasoned salt, onion and green onion.  Mix well; marinate at least 1/2 hour or overnight (or during the day). Remove onions and green onions; reserve.  Brown chicken in a skillet, or bake chicken on a cookie sheet or in a baking dish at 450  for 1/2 hour; turn chicken pieces over and cook 15-30 minutes or til juices run clear and meat is no longer pink when slashed.  Put onions and green onions in a large pot with the butter. Add thyme, chicken, and tomatoes.  Pour in about 1 cup hot water.  Cook on high til the water dries out (about 15 minutes- don't let chicken scorch!).  Add one more cup water- cook until it's HALF dried out, then it's done.  Serve over rice.

This is SOOOO good!

 
0 Comments

Year's Supply quantities, Roast Chicken Dinner with rice, and apple crisp

10/26/2010

0 Comments

 
Hi,

Remember  this?

"We encourage members world-wide to prepare for adversity in life by having a basic supply of food and water and some money in savings.” “For longer-term needs….gradually build a supply of food that will last a long time  and that you can use to stay alive” (from All is Safely Gathered In, First Presidency pamphlet)

Here is what a basic supply of food includes:  it will provide about 2200 calories a day, which means you’ll probably get 1800 and your husband will get 2600.  This is less than most people are used to, especially if you're suddenly living a 'more active' lifestyle, but it will keep you alive!

300 lbs grains- includes Wheat, Rice, Rolled Oats, Dried Corn, Popcorn, Flour, Pasta Products, Dried Potatoes.  Some lists say 400 lbs per person, but the current Church site says 300.  Take your pick, according to what you can handle.  Storage-wise or hunger-wise; that extra 100 lbs provides an extra 435 calories per day.

16 lbs. powdered milk- this is just enough for cooking, about ¾ cup per day.  You can store instant, regular powder, and canned milk.  It takes about 5 (12-oz) cans to equal one pound of powdered milk

60 lbs sugar- this includes white sugar, brown sugar, powdered sugar, honey, molasses, jam/jelly, corn syrup, fruit drink mix, gelatin.  If you have honey that crystallizes, set the bottle in the sun on a warm day, or put it in a pan of water on lowest heat overnight.  It will become liquid again.  You will want more sugar than 60 lbs. if you can your own fruit.

10 quarts cooking oil (2 ½ gallons)- yes, YOU NEED FAT.  Your brain is made mostly of fat.  Guess what happens if you don’t get any fat in your diet?  Plus, it’s a lot of calories for very little storage space.  The darker & cooler you keep it, the longer it lasts.  Fats include shortening, cooking oil, butter/margarine, mayonnaise, peanut butter.

8 lbs salt per person-  this is the cheapest of them all!   In addition to the round canisters, you can buy salt in 4-lb rectangular boxes; these stack together more efficiently.  At Sams’ Club, these boxes are just under $1.  Woo-hoo!  Two bucks and you have your personal salt for the year!

60 lbs. legumes, dried- includes soybeans, pinto beans, white beans, kidney beans, lima beans, anything that ends with ‘bean’ (unless it begins with ‘jelly’), black-eyed peas, split peas, and lentils.  These are a great, inexpensive source of protein.  Store the same as wheat- dry, clean, dark and cool  if possible. It takes 4 ½ (15 oz) cans to equal one pound of dry beans.

14 gallons water per person.  This is just 2 weeks’ supply, for drinking and a tiny bit for washing; the minimum our church leaders have counseled.  You may also want a way to purify water for longer-term use.  To purify, you can boil water for 2 minutes, or use chlorine bleach (plain only, not scented!)  If the water is clear, use ½ tsp. per 5 gallons of water.  If the water is cloudy, use double; 1 tsp. per 5 gallons of water.

Children do not need a full adult’s portion.  For them, figure age 3 and under= 50%, ages 4-6= 70%, ages 7-10= 90%, ages 11 and up= 100%.

Obviously, kids' ages are always changing, so when I calculate what to have on hand ( I inventory every Conference), I project out six months to a year. For instance, if someone is 6 years old, I count that child as 7 years. That way I'm not always slightly behind when it's time to replenish.

 * * * * *

Recipes today are for a whole meal….

Roast Chicken               From Living On a Dime, Jan 2010.  
Here is a very basic but yummy recipe. You can also put this in a crock pot to slow cook all day.


1 (3 lb.) whole chicken
Salt and pepper to taste
1 Tsp. onion powder
1/4 cup butter or margarine 
1 stalk celery, leaves removed

Season the whole chicken inside and out with salt, pepper and onion powder. Place breast side down in pan placing margarine and celery into cavity. Bake at 350° for 1 hour and 15 minutes or until internal temperature is 180° (82° C). You can baste with juices or melted margarine once or twice. Remove from oven and cover with foil for 30 minutes and let it rest before cutting.

You can easily adapt this recipe to your own likes and dislikes. For example, you might use garlic powder instead of the onion powder, you could slide slices of lemons or garlic cloves or even onion slices under the skin. Try other seasonings, too.

The main thing that makes this recipe great is cooking it breast side down, which makes it extra juicy.

Cheesy Peas and Rice

2 1/4 cups rice, cooked                                              
1 (10 oz.) pkg. frozen peas, thawed

1 (6 oz.) can of mushrooms, drained                          
6 oz. Velveeta, cubed*


Combine all the ingredients in a greased 1 1/2 qt. baking dish. Cover and bake at 350° for 20 minutes.

I didn't used to buy Velveeta because it was more expensive than other cheeses, but since it is the same price or less than cheddar now, I buy it more often.


Apple Butterscotch Crisp

This recipe is good served with ice cream or, for something different, try a slice of cheese or a dollop of sour cream.

 5 large (7 small) apples, sliced and peeled               
1 tsp. cinnamon

1 cup brown sugar, depending on your apples           
1/2 cup flour

1/2 cup quick cooking oatmeal                                      
1/2 cup butter or margarine, cold                                     

1 pkg. (3.5 oz.) cook and serve  
          
butterscotch pudding


Place apples in a greased 9x13 pan. Mix everything else in a bowl, cutting in* the butter until it resembles coarse crumbs. Sprinkle over apples. Bake at 350° for 40-45 minutes or until apples are tender.

You can leave out the butterscotch pudding; it won't throw off the recipe. It will still be delicious. 

*Whenever a recipe says to cut in something, that means to take a pastry cutter and mix the butter, margarine or shortening in with the dry ingredients until the mix gets crumbly looking. (I just use my fingers. It is easier for me to wash them than a pastry cutter.)

Roast Chicken Leftovers:

Chicken Spaghetti Bake-  Make your favorite spaghetti, mixing noodles and sauce. Instead of adding hamburger to it or leaving it without meat, add some cubed leftover chicken. Put it in a 9x13 greased pan sprinkle with mozzarella cheese and grated Parmesan cheese. Bake at 350° until heated through and cheese is melted.

Make Chicken Soup with leftovers- see the recipe for turkey soup.  Use ¼ the amount of water and spices for chicken because it’s so much smaller!

Leftover Leftovers- If you have any of this soup left, thicken it with a little cornstarch or flour mixed in water. Make a batch of biscuits or use any leftover biscuits you have and pour the thickened soup (now like gravy) over it.
0 Comments

Water Storage, Powdered Milk recipes & notes

10/25/2010

0 Comments

 
Picture
Powdered Milk from the Home Storage Center, $1.40/lb.  The bowl holds yogurt.  You can make plain yogurt as cheap as $ .42/quart, or $ .10/serving.

If you don’t have your water storage yet, what is a good price for water drums? Prices vary, but generally figure $1 per gallon of storage capacity.  The 55-gallon drums, then, will probably be $55 or less.  Once in a while they go on sale; I've found them at Macey's (our grocery store) for $40.  They're even cheaper if you can find them in the classifieds.  Only use food-grade drums. Empty pop bottles or juice bottles work great, but milk jugs break down fairly quickly and will leak.  If you are using  chlorinated city water,  you do NOT have to drain and refill these every year.  The First Presidency has asked us to store at least 14 gallons per person.  This is one gallon per person per day for 2 weeks. 
Attached are the recipes from yesterday's class on powdered milk.  Here's a list of what is there, and a few notes on them.  Sorry, it's a scanned-in document, so I couldn't go through and type in my notes.

Anyplace I've put cost of a recipe, it's based on the following: $1.40/lb for powdered milk, $13 for 25 lbs of sugar, $2 for a pound of butter, $8 for 25 lbs. flour.

For the recipes that give you whey (any of the cheeses, including the yogurt cream cheese), save the whey.  It has vitamins, minerals, some protein, no fat, and some milk sugar (lactose- very low on the glycemic scale).  I use it in pancakes, muffins, bread, etc.  If  your whey has vinegar in it (most of the cheeses use this), you can add 1 tsp. baking soda for every 2-3 cups of whey.  This will neutralize most of the vinegar.  Yes, it will foam up, kinda like those volcanoes you made in 3rd grade…

Go to http://everydayfoodstorage.net/training-cooking/powdered-milk  for  recipes for evaporated milk, Magic Mix, and Condensed Soups using Magic Mix. And she has a great little chart you can print out and tape to the inside of your cupboard  so you know how much milk powder to use when you're baking with it:

http://www.everydayfoodstorage.net/handouts/milk-conversion-charts.pdf

The Wooden Spoon class handout has a TON of info on powdered milk.  It is from some classes that the LDS Church's Welfare Square was teaching for a little while. The collection is not copyrighted; the two ladies who compiled it just wanted to spread the information.
   
When I get a bunch of new recipes, usually most of them get ignored unless I'm already familiar with them.  So let me familiarize you with all these possibilities....                        


 The first couple pages include:

what the difference is between regular and instant dry milk

storage times-  which are completely off!  Ignore what it says;  a BYU study shows that canned dry milk has been found to last 20+ years when kept at room temperature and below.

Mixing and drinking it- how to make it taste the best

Cooking with powdered milk

How much to store per person

How to determine if milk is past its prime shelf life

What to do with it if it's too old

Reconstituting chart

 
Now the recipes-

'whole milk' (powdered milk is powdered SKIM milk)

Buttermilk substitute

Evaporated milk- everydayfoodstorage link above gives quantities for a 12-oz can.  This costs $ .25.

Sweetened Condensed Milk – for the closest version to a 14-oz can, use

1/2 c. (non-instant) powdered milk
1/2 c. water
1 c.  sugar

0-2 Tbsp. butter

 If you like to be precise, use 1 1/2 Tbsp. less than 1/2 c. water (this also gives a slightly thicker result, like the can), but the first way is very close (yields 14 3/4 oz)    Other recipes use more -or less- of any of those ingredients.  Really, they all work. That said, the 'closest' version costs $ .39 if you use no butter, and $ .53 if you use 2 Tbsp.  What a deal! One important thing to know- these recipes call for hot or boiling water so the sugar gets completely dissolved. Otherwise you get grainy condensed milk.  I usually put my sugar with the water, then microwave and stir until the sugar dissolves.  Then blend with the milk powder and butter.


Hot Cinnamon Milk Mix- from an old 'Friend' magazine

Hot Caramel Milk Mix- like hot chocolate, only not!

Hot Chocolate Mix- one of many options out there, this one you just add water to.

Strawberry Shake- with a touch of orange to pep it up.  yummy.

Creamsicle Drink Mix- uses 3 Cannery products.  And it is really good.

Orange Julius- uses the church cannery orange drink powder.  You could use Tang if that's all you have.

Presoaked Wheat Blender Pancakes or Crepes- blender pancakes that are a little easier on your blender.  You just have to plan ahead with these.

Whole Wheat Pancake Mix

Fruit Syrup- no powdered milk here- just a really handy way to make a fruity topping for your pancakes.  The handwritten note says "Can use peaches canned in syrup and you just add cornstarch and cook"  Use 1-2 tsp. cornstarch per cup of syrup/juice.

Basic White Sauce

Cheese Sauce Mix- uses powdered cheese, pdr. milk and pdr. butter.  And onion powder.  (Remember my method of making onion powder?)

Low-Fat Cream Soup Mix -replaces 9 cans of condensed creamed soup, at $ .30 per can!

Potato Soup Mix-   very very easy.  (Well, they all are..)

Broccoli Soup- using all fresh ingredients except for the milk

Biscuit Mix- "Bisquick" where you add only water.  Use for any Bisquick recipes.  This makes as much as 2  40-oz boxes, at about $2.75/box

Honey Dinner Rolls

Whole Wheat Muffins

Weiner Schnitzel- not what you think, it's the old German dish.  Uses noodles, cheese, hotdogs.

Macaroni and Cheese- using the little 5-oz jar of cheese sauce.  This is a 'bag' recipe; everything can be put in a bag ahead of time and kept on a shelf (or given to a friend)

Microwave Caramels- mmmm

Whipped Topping- A little explanation here...  Evaporated milk will whip like cream if it is ICY-cold when you whip it.  This is glorified whipped evaporated milk, starting with the powder.  They add a few things for flavor, some oil for richness, and gelatin to keep it from going flat.  I think the gelatin gives it a strange consistency.  Next time I'll use a couple teaspoons of Instant Clear Jel.  Or cook some cornstarch with the water.  Or forget stabilizing it, and just eat it fast- maybe just whip evaporated milk and add sugar and vanilla to taste.

Fudgsicles-  don't these sound good?

Dry Milk Ice Cream- Bad name, but it uses sweetened condensed milk, which makes it really good.  The recipe claims to make a gallon, but it's really more like 2 quarts.

Peanut Butter Chews- similar to Bit-O'Honey if you use the honey instead of corn syrup.

Vanilla Pudding Mix- fat free, and has variations for chocolate and caramel pudding. When you make it, you add a tiny bit of butter and an egg, so it’s still lowfat, just not fat free.  If you cannot have wheat, substitute half as much cornstarch as the flour called for.

Plain Yogurt- really, this IS easy.  The recipe says it makes 2 quarts, but part of the water got left off the ingredients list.  Use 7 cups instead.  If you use your hottest tap water, this will be about right to start incubating.  You need the yogurt to start out between 105 and 120 degrees.  The lower end gives sweeter yogurt, the higher end makes it more tart. Wrapping the jars in a towel help keep it warm. Some warm areas to incubate it are- on top of a heating pad (cover with a  towel), an insulated cooler (I put in a jar of almost-boiling water to warm it up in there), a water-filled crockpot, a warm oven (an oven thermometer is helpful!  Hotter than 130 degrees will kill those friendly bacteria.).  Or get creative.  This costs only $ .42  per quart if you are using your own starter. 

Vanilla Yogurt- has gelatin in it, like most of the store-bought versions. This keeps it firm, even after stirring.  (Yogurt with no gelatin will become drinkable after stirring.)  If you want to use sugar instead of honey, use from 1 to 1 ½ cups.  And dissolve (boil) it in some of the water first, or it will settle to the bottom. You could use a package of flavored Jello- a 3 oz box is just under ½ c. of sugar, and  as much gelatin as one packet of unflavored.   Or use juice/syrup from canned fruit as part of your water.  Stir in fruit after the yogurt sets up.

Almond Crunch Granola- also no powdered milk, unless you count what you pour on top when eating this!

Strawberry Banana Smoothie- uses the yogurt you just made…

Yogurt-Fruit Smoothie- Banana-orange; uses yogurt as well as powdered milk

Yogurt Breakfast Waffles- yogurt makes them extra moist.  They also have a hint of orange and cinnamon in them.  I love these using the lemon yogurt.

Yogurt Dill-Veggie Dip- close to Ranch Dip

Yogurt, Berries, and Pecans on Crispbread- self-explanatory

Ranch Salad Dressing-  do you have any idea how much better fresh made is?

Fruit Yogurt Salad- uses vanilla yogurt and whatever fruit you have

Yogurt Parmesan Chicken- uses yogurt instead of mayonnaise or eggs to get the coating to stick.  Very good.

Granola, Yogurt, Berry Parfait- kinda like those little ones at McDonald’s, only you sweeten plain yogurt with honey.  You taste the fruit better this way.

Mock Mozzarella Cheese- about $1.50 per pound.  It only takes 10 minutes to make!  And it melts wonderfully.  Do use a blender to mix everything, otherwise the oil won’t mix in with the cheese curds and you’ll end up with a layer of oil on top of the whey.  (Make bread!)  NOTE- the recipe doesn’t tell you about salt.  Unsalted cheese is not very tasty.  I use 1 tsp. salt for this; I mix it in after rinsing the curds.   Even wrapping in cheesecloth, and pressing (under whatever heavy thing I can find) overnight, this hasn’t ever been cohesive enough for me to grate.  It crumbles, though. When I aged this for a couple months, it became very creamy and softer.  If you don’t have cheesecloth, you can use a piece of cotton fabric- something that will let the liquid drip out.  Cheesecloth can be found in some grocery stores in the kitchen tools section, or in fabric stores and Walmart over with the notions.

Parmesan Cheese- this is in already-crumbled form.  Best flavor after aging in fridge for 3 months, but still good used right away. 

Yogurt Cream Cheese, Yogurt Sour Cream- which one you make only depends on how long you let the yogurt drain.  16 ounces of yogurt will make just over 8 oz. of cream cheese, so it costs about $ .21  per 8 oz block.

Easy Homemade Cheese Ball- a cream cheese based cheese ball.  Use your yogurt cream cheese.

Mock Ricotta Cheese- about $ .84 for the batch, using your homemade yogurt.  ‘Real’ ricotta uses whey instead of milk, but normally you don’t have easy access to whey.  If you do (from making mozzarella?), use ¼ c. vinegar in 2 quarts whey, heat to simmering, then let sit for several hours for the curds to form.  Then strain through cheesecloth, salt,  and press.

Jalapeno Cheese- variation on the ricotta. 

Queso Blanco- this one does not melt; it holds its shape through cooking.

Homemade Cottage Cheese-  this makes the curds.  To make the creamy liquid the curds sit in, use a little yogurt, sour cream, or evaporated milk to the curds.  I like it with ¼ tsp. salt.  Add more if you like. The recipe makes about 8 oz. of curds and costs $ .36 

Cottage Cheese Scramble- a form of scrambled eggs, only mostly cottage cheese, with chives.  

Cheese-Stuffed Jumbo Shells- like Manicotti.  For those of you unfamiliar with it, this is similar in flavor to lasagna, only you use shaped pasta and stuff them, instead of doing layers.  The recipe calls for ricotta, cottage cheese, mozzarella, and Parmesan cheeses… but use what you have.  When I made it for the class, I used only cottage cheese, with mozzarella just on the top.  And only about a cup of spaghetti sauce.

Happy cooking!  

-Rhonda


0 Comments
<<Previous
Forward>>

    Need a Search bar?
    One day I may upgrade my website-- but until then, use your web browser search bar. Type in my web address and what you're looking for, like this-- 
    www.theprovidenthomemaker.com  pumpkin --  and you should get results.


    Author

    I'm a disciple of Christ, a member of the Church of Jesus Christ of Latter-day Saints, a family-defending, homemaking, and homeschooling mom of eight children, two of whom sometimes can't have milk or wheat. Growing up on a farm in a high mountain valley, my parents taught me to 'make do', work hard, smile, and help others.  I love cooking, learning, growing food and flowers, picking tomatoes, and making gingerbread houses --which CAN be made allergy-friendly-- with my children.  I hope you find something to help you on my site!

    Archives

    April 2024
    July 2023
    April 2022
    September 2021
    March 2021
    December 2020
    April 2020
    March 2020
    February 2020
    January 2020
    December 2019
    November 2019
    October 2019
    September 2019
    August 2019
    July 2019
    June 2019
    May 2019
    April 2019
    January 2016
    November 2015
    October 2015
    September 2015
    March 2015
    February 2015
    November 2014
    October 2014
    September 2014
    August 2014
    July 2014
    June 2014
    May 2014
    April 2014
    March 2014
    February 2014
    January 2014
    December 2013
    November 2013
    October 2013
    September 2013
    August 2013
    July 2013
    June 2013
    May 2013
    April 2013
    March 2013
    February 2013
    January 2013
    December 2012
    November 2012
    October 2012
    September 2012
    August 2012
    July 2012
    June 2012
    May 2012
    April 2012
    March 2012
    February 2012
    January 2012
    December 2011
    November 2011
    October 2011
    September 2011
    August 2011
    July 2011
    June 2011
    May 2011
    April 2011
    March 2011
    February 2011
    January 2011
    December 2010
    November 2010
    October 2010
    September 2010

    Categories

    All
    Alcohol
    Alternate Cooking
    Appearances
    Apple
    Apricots
    April Fools
    Aprons
    Bananas
    Beans
    Beef
    Beets
    Bench
    Beverages
    Bonnet
    Bread
    Breakfast
    Budget
    Budgeting
    Cake
    Candy
    Canning
    Carrots
    Cheese
    Chicken
    Children
    Chocolate
    Christmas
    Cleaning
    Coconut
    Comfrey
    Common Core
    Constitution
    Cookbook
    Cookies
    Cooking Oil
    Crafts
    Dairy Substitutions
    Dehydrating
    Dessert
    Dried Fruit
    Earth Oven
    Earthquake
    Easter
    Edible Weeds
    Eggs
    Emergency Prep
    Essential Oils
    Faith
    Family Home Evening
    Fertilizing
    Food Storage
    Fourth Of July
    Freezer
    Frosting
    Fudge
    Garden
    Gardening
    Gingerbread
    Gluten
    Gluten Free
    Gold
    Government
    Grains
    Gratitude
    Hat
    Herbs
    Home Remedies
    Home Repairs
    Homeschool
    Home Storage
    Honey
    Hope
    Inflation
    Leftovers
    Legumes
    Lemon
    Main Dishes
    Mixes
    Mothers
    Noah
    Non Artificial Colors
    Non-artificial Colors
    Nuts
    Oats
    Oil
    Orange
    Paint
    Peaches
    Pear
    Pie
    Pizza
    Plums
    Poem
    Popcorn
    Pork
    Potatoes
    Powdered Milk
    Prayer
    Preparedness
    Projects
    Prophecy
    Pruning
    Pumpkin
    Quick Bread
    Rhubarb
    Rice
    Salad
    Salt
    Sauces
    Self Reliance
    Self-reliance
    Sewing
    Shelf Life
    Shelves
    Sky
    Smoothie
    Snacks
    Soup
    Spices Or Seasonings
    Squash
    Strawberries
    Substitutions
    Sugar
    Summer Fun
    Three Month Supply
    Time
    Tomatoes
    Trees
    Truffles
    T-shirts
    Tuna
    Ultra Gel
    Valentine\'s Day
    Vegetables
    Water
    Watermelon
    Wheat
    Work
    Year Supply
    Zucchini

    RSS Feed

Web Hosting by iPage